Showing posts with label paper bag albums. Show all posts

Wednesday, June 13, 2012

Mariposa Paper Bag Album

Just had to share pictures of the Mariposa album that my daughter & I have been working on (it seems like FOR EVER). Finally got it finished & listed on ETSY.


The cover is made from matte board cut to size and covered with scrapbook paper. I used the Mariposa stacks (prints & solids) by DCWV. A scrap of black velvet upholstery fabric was the perfect finish on the spine - it adds a lovely texture as well as helping stabilize the 3" book. A piece of gimp finished with antique brass brads edges the velvet. The paper was so beautiful, I didn't add any embellishment except the button closure - a vintage one from a local antique shop that I love. A piece of copper jewelery wire was threaded through a glass bead to cover the button holes and secure the button to the cover. Punched a hole, threaded the wire through, covered with matching paper and lots of glue for stability then finished with a piece of woven ribbon.


This is the thickest album I've even made! Talk about real estate - there's space for 41 photos (6" X 4"). More photos can be tucked into the large pockets formed from the bag's tops. I die cut 26 tags (6 1/4" X 3 1/8") that are decorated on the front and backed with solid ivory paper for even more space for smaller photos, ephemera and journaling. I added 24 mini tags (1 5/8" X 3 1/4") for fun little places to journal or tuck in things like ticket stubs, fortunes from a special Asian meal, small pressed flowers from a special bouquet (like the wild flowers my grand kids bring me). The only limit is your imagination!


Typical construction of paper bag albums usually use the bottom of the bag. I was very frustrated by the unevenness of the bag's construction, so I cut the bottoms off and made small pockets from card stock to replace the discarded bottoms. This created additional storage for even more tags.


The amount of time Katie & I spent on this album really shows in the details. We wanted this album to be special and I think we achieved that.


All the tags were die cut using my Big Shot. This particular one was stamped, a butterfly image cut out, smaller butterflies punched and Stickles added for a bit of bling. I left the small butterfly wings loose on the edges and shaped them a little with a ball tool I use for shaping paper flowers. This gives the feeling that they are just hovering above the paper.


The large pink tag is representative of all the tags designed for the pockets created from the bag itself. The edges are die cut and holes hand punched on the front for added interest. A small ribbon bow adorns the tag and helps us grab hold of the tag to remove it easily from the pocket. This tag was masked with a piece of coarse cotton lace and sprayed with teal Glimmer Mist. Each tag opens like a greeting card and is completely plain except for those that were masked and sprayed, leaving a lot of space for large photos and other ephemera. Click on the pictures for a larger version that makes it easier to see the details. (The vintage crocheted table runner was made by my British grandmother in the early 1950's.)


This open green tag shows its simplicity, allowing more space for all those 4" X 6" pictures we sometimes have trouble placing in our albums.


This paper stack stretched my comfort zone, using color combinations I wouldn't normally use. I discovered several that I'll be using again thanks to the creativity of the paper's designers. Hope you guys enjoyed seeing what we've been up to. Hope you'll take time to add a comment - all comments are most welcome and we look forward to hearing from you! Till next time - take care!

On a personal note - today is my baby's birthday - Happy 27 Katie - I love you!


Tuesday, May 8, 2012

New Paper Bag Album


Just finished a new paper bag album for a swap over at swap.bot. The theme was "nature". I used 2 bags split down the gusset and covered with card stock to form pockets. A third bag with handles was also split along the gusset and added to make the cover. You can see my inspiration in the background of the picture (the side yard between our log cabin and Spider Creek that runs through our property).


There are four large pockets formed with the split bags and additional smaller pockets that hold tags.


This is the first spread in the album. I used the Tim Hotlz bird cage die cut along with lots of different flowers and leaves mostly punched using McGill punches.


A close-up of the bird cage page. I really like the way it turned out. This was the first time I'd tried using so many different small pieces on one page. Some Stickles add a little shine & glitz.


The next spread shows the smaller pockets and embellished tags. The butterfly is a Sizzix die featuring a solid butterfly and a matching one with cut-outs. I left the cut-out wings free to give the image some dimension.

A close-up of some of my tags. I cut them out using a Tim Holtx die cut - love the size - just right for a small photo and some journaling. I created mats using Spellbinders Nestabilities, and left the backs of the tags plain for more photos or journaling. The small butterfly is a punch I've had for ever. I think it came from Hobby Lobby and was made by the Paper Studio.


I used Spellbinders Nestabilities again to cut a mat for the page. I embellished it with more punched flowers and a little glitz from the Stickles.


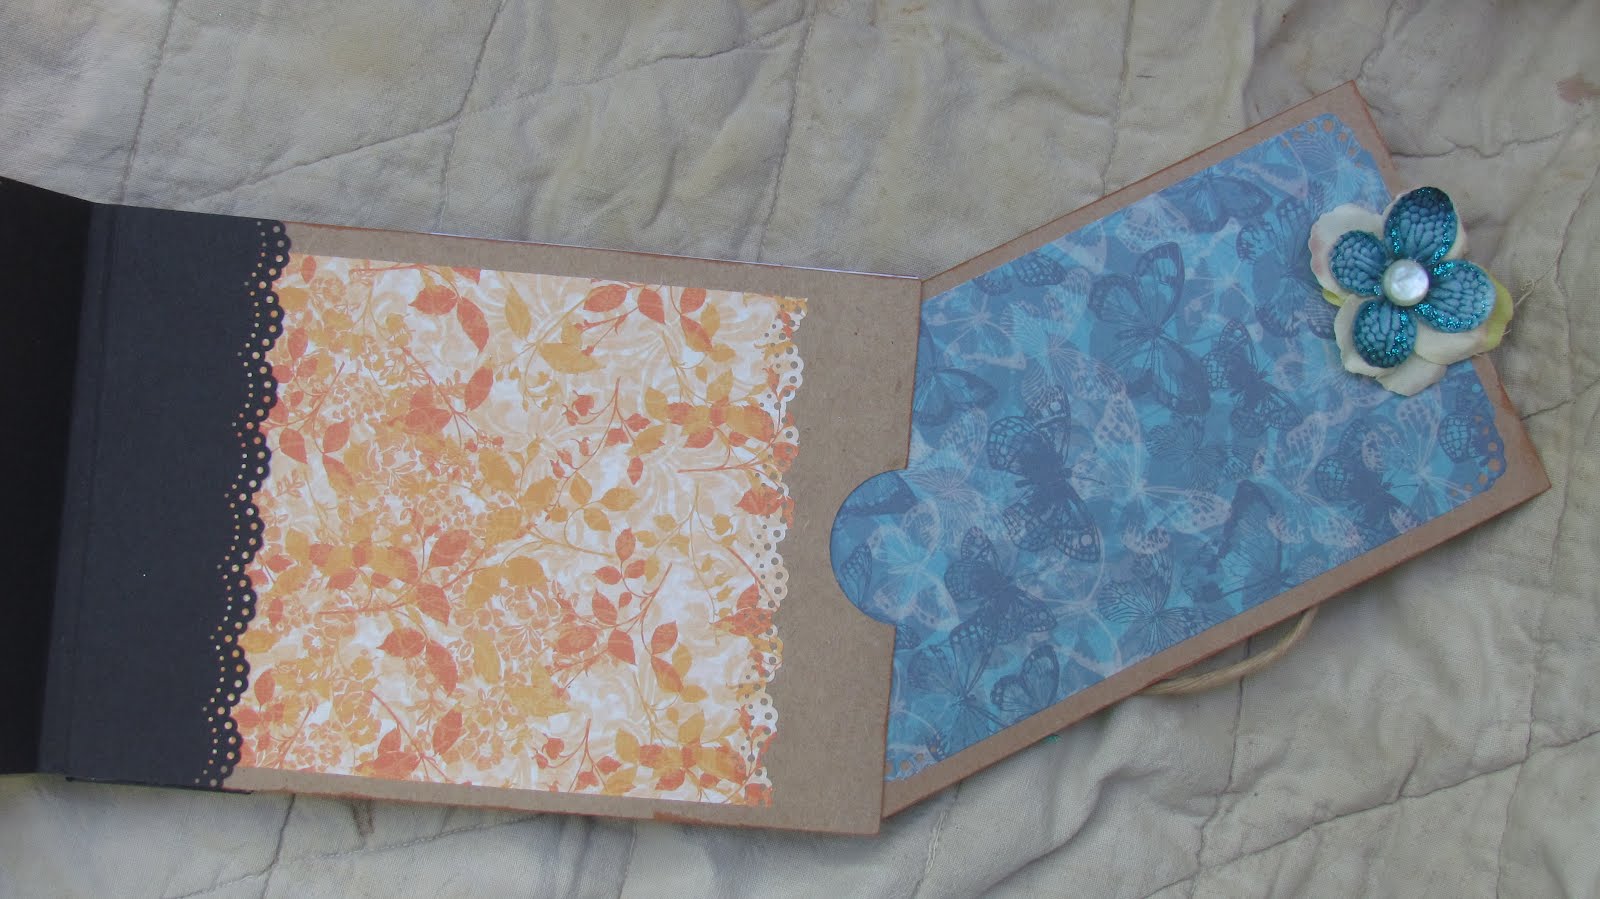
Large rectangular tags slip inside the bag pockets and are simply embellished with a paper mat and silk flower accented with a bit of Stickles and a pearl button. This gives a nice space for some 4" X 6" pictures.


I hope my swap partner will enjoy adding her special photos and memories as much as I enjoyed making it! Thanks for stopping by - take care until next time.


Friday, April 13, 2012

Lime Green Paper Bag Album

I completed this paper bag album this week for a swap over at www.swapbot.com. There's a group for swapping these little darlings, and since I love creating them, I just couldn't resist joining. This swap was 2 Bags - Artist's Choice. I usually wait until partners are assigned so I can check out their profile and try to create something the recipient will like. My partner for this swap likes green & frogs, so this is what I came up with. I started with 2 lime green gift bags from Hobby Lobby. After folding them in half, I layered them with the tops of the bags facing opposite directions and punched 3 holes using my Crop-A-Dile II. Lime green rat-tail cord was threaded through the holes and tied at the top to bind the book. I added a piece of white satin ribbon through the middle of the book for additional stability.


I cut three tags for each pocket formed when the bag was folded in half. I used my Tim Holtz "On the Edge" file folder die and my Sizzix Big Shot machine to cut the edges.


I cut smaller tags using the Sizzix Die Tags #3 and embellished them with flowers created by layering the two smallest flowers from Tim Holtz's Tattered Florals with the two smallest flowers from the Spellbinders Carnation Creations. I joined all petals to the tag using brads.

The padded frog stickers are from the Paper Studio.


Pieces of card stock were cut diagonally using the Tim Holtz "On the Edge" Scallops die to create pockets to hold the tags.


Thanks for stopping by! Until next time, happy scrapping! Shirley & Katie

Tuesday, February 28, 2012

Vintage 70's Baby Album

Hey guys! Today I want to share some pictures of the '70's baby album I'm working on for a teacher I work with. The colors drove me a little crazy - not what I usually choose for a baby album.


Everything spread out on the dining table - seems I work best with lots of choices around me. The base of the album was created using 5 Ivory cards/envelopes from the Paper Studio (Hobby Lobby) 5" X 6.5". I assembled them using my usual hinges with a 1/4" gutter. Paper from the "Tattered and Worn" Paper Studio stack was used for photo mats and tags. The solid brown, blue and olive green are from an unknown source. The odd looking red plastic cup is holding my bottle of "The Ultimate" adhesive (upside-down to keep the really thick glue easy to access). I used the envelopes to create the album pages by sealing them closed (I use glue to hold them closed, not trusting the lick-and-stick stuff on them) and cut a scant 1/8" off the bottom to form the "pocket". This cut edge becomes the top of the page; so basically, the envelope is turned up-side down.


I used the cards for tags, cutting diagonal edges on one side of the card, then punching the edge with the Martha Stewart Doily border punch. I also used it to shape the edges of the connecting hinges.


I found some great vintage baby shower cards from my mother's and my mother-in-law's collection of baby "stuff" they collected over the years from their own showers, along with some flea market finds. I scanned the originals and re-sized them to fit the album. I don't like to cut up the original ephemera. I try to preserve it for future paper artists to discover. I own the original pieces, but don't claim to own the copyright(s) to any of them. I'm sharing them for your personal use only. Please don't put these on a CD or collage sheet for sale. You may use them in art you hand create and sell, nothing commercially produced. A link back is appreciated, but not mandatory. I'd love to see what you create using these images.


I'll post more pictures of the album showing how I used the images, along with more images for you guys soon. Take care & happy creating!

Sunday, February 19, 2012

Tag Pictures

Hi everyone!
I'm posting pictures of the tags in the Persnickety #3 album. Just wanted you guys to see how we've done the interior tags for the large bag pockets and the cute tags we cut using the Spellbinders Nestabilities Label #14.


The first tag in the album is made using a vintage reproduction of a lovely lady. Her picture can be left as is or your favorite image could be mounted on the 3 1/2" X 4 1/2" tag. The back has a journaling stamp in StazOn Timber Brown. Two different sizes of the Nestabilities Label #14 were cut and distressed using Tim Holtz Distress Ink in Tattered Rose. A journaling stamp in French was applied to the smaller label using Timber Brown.

The page on the right of the two-page spread was embellished with a Sizzix Bigz Die - Flourish, Floral w/Leaves. I thought the black flourish gave the page a classic look.


The next spread shows two of the tags designed for the bag pockets. The tag on the left is embellished with a hand-cut boarder using the Martha Stewart Doily Lace punch. Two tags from the Spellbinder's Shapeabilities Blossom Tags and Accents were distressed using Tim Holtz Distress Ink in Soot and layered along with a straight paper band. The flower was hand punched, layered and accented with a dot of Stickles. The tag on the right features a pocket with a tag cut using Label #14. An image of the Eiffel Tower is stamped using Timber Brown. Label #14 was used in two different sizes along with a simple straight band to embellish the page. All were distressed using the Soot ink.


There is so much more to setting up an Etsy shop than I ever imagined. I think Katie and I are almost ready to post our first paper bag album for sale. Trying to figure out shipping, taxes and shop policies has been an education in itself! Keep watching for the big announcement! 'till next time - Ann & Katie

Wednesday, February 1, 2012

Mini Album Idea

I've just started a new mini album with a twist. Instead of the paper bag albums I've been making lately, I'm working on a design using a 12" X 12" sheet of card stock, folded in half, cut into 2 pieces for my pages. The binding I'm using is sort of like the step books I've made with my elementary students, only in miniature. Right now it's in the planning stage with pieces of paper in various stages of construction strewn across my daughter's dining table!

She's just started 4 lovely paper bag albums using the Mariposa paper stack by DCWV (Die Cuts With a View). I've been saving this lovely paper for just the right project and when Katie showed me her design ideas, I knew she needed this special paper. Each mini will have 6 black paper bags (lunch size), lots of tags (creating ample space for both pictures & journaling) and are going to be gorgeous! I'll post pictures of both projects soon.

Katie has recently become a stay-at-home mom and is loving it. She's having so much fun with Alex (six and in kindergarten) and Emily (four - going on twenty!). This hiatus is giving her a chance to get back to creating again. She's always loved drawing and photography, so she's been thrilled to apply her design sense to paper arts. She's expressed a desire to design her own line of paper, so be sure to watch for her original papers in future projects.

Tuesday, January 31, 2012

Paper Bag Albums

I just had to share pictures of the paper bag albums my daughter & I have been making. She & I worked on the design details together, then we created three more using the same paper pack (Persnickety by the Paper Studio - Hobby Lobby) along with some black, white & maroon solid cardstock from an unknown company - I buy things everywhere - if it doesn't have a name on it, I'm just out-of-luck

We used six white paper bags (lunch bag size) to create the base of each album, giving lots of space for pictures & journaling.

Each of the six big pockets hold a tag that measures 5 1/4" X 6". They are designed to be used as-is by folks that don't scrapbook (or want a hand crafted gift but don't have time to create) as well as leaving plenty of space for you scrapbookers to personalize the album with treasures from your stash!

Thirteen smaller tags are tucked invitingly under belly bands and in pockets. Two are even hiding inside a pocket on one of the large tags. Many edges are delightfully shaped along one side with the Martha Stewart Doily Lace Edge Punch. When we were designing this album the papers just screamed "Paris!" So we allowed the album to sweep us away as it grew a personality of its own. You'll find stamps of the Eifel Tower, reproduction prints (from public domain sources) including lovely ladies and old-fashioned postcards. Paper flowers adorn some of the pages. These were hand punched from coordinating paper, layered and distressed using Tim Holtz Destress Inks. Stickles, glimmer mist and vintage buttons add to the album's charm.
The cover was created using heavy mat board for a strong, lasting cover that will protect your precious memories for many years to come. Ribbon and silk flowers with a vintage button center form the closure.

One of these albums would be a perfect gift for someone special, yourself included! There are only four available. The outside covers are the only difference, the interiors are as identical as any hand created piece of paper art can be.

Persnickety #1 features a brown binding with intersecting lighter lines forming squares. The flower closure was created with a green base topped with a hot pink blossom sporting fun navy spots and a vintage pearl button.

Persnickety # 2 sports the same brown binding as #1. The flower that adorns this album has a green base topped with two layers of soft mauve petals and a vintage pearl button closure.

Persnickety # 3 has a lovely dark brown binding with tiny pink polka dots. A beautiful green base along with two layers of hot pink petals accented with the fun navy dots and yet another vintage pearl button create the lovely closure on this album.

Persnickety # 4 has the same lovely binding as featured on #3. The flower closure adorning this album has a green base topped with a single soft mauve blossom and vintage button. I'm having difficulty getting a picture of # 4 to download. With my luck I'll publish this post only to have a half-dozen copies that I'll have to try to edit out!

The buttons on these albums came from my grandmother's button box that I played with as a young girl many years ago. I've decided it's better to get them out and use them where their old fashioned charm can be shared than to leave them on the shelf in an old tea biscuit tin. I am saving some for my grand daughter who loves to play with grandma's buttons as much as I once did. I'm setting up an ETSY store to sell these albums. I'll post the url for it soon, so check back!